

What up guys and all you exciting creators out there—Sean Flac checking in!
Today I want to share something really fun and personal: how my son and I turned one of his original drawings into a real stuffed animal we now call Ruffle and Stuffle. This project was full of creativity, family teamwork, and a few sewing lessons along the way. If you’ve ever wondered how to turn a drawing into a stuffed animal, this post will give you the inside scoop on how we pulled it off.
The Idea Spark
My son has always loved stuffed animals, and he recently came across a few websites where you can upload a drawing, send it in, and they’ll create the plush version for you. Pretty cool, right?
The catch: those services usually take 30–45 days. His birthday was just a couple of weeks away, so I decided to see if I could make it myself.
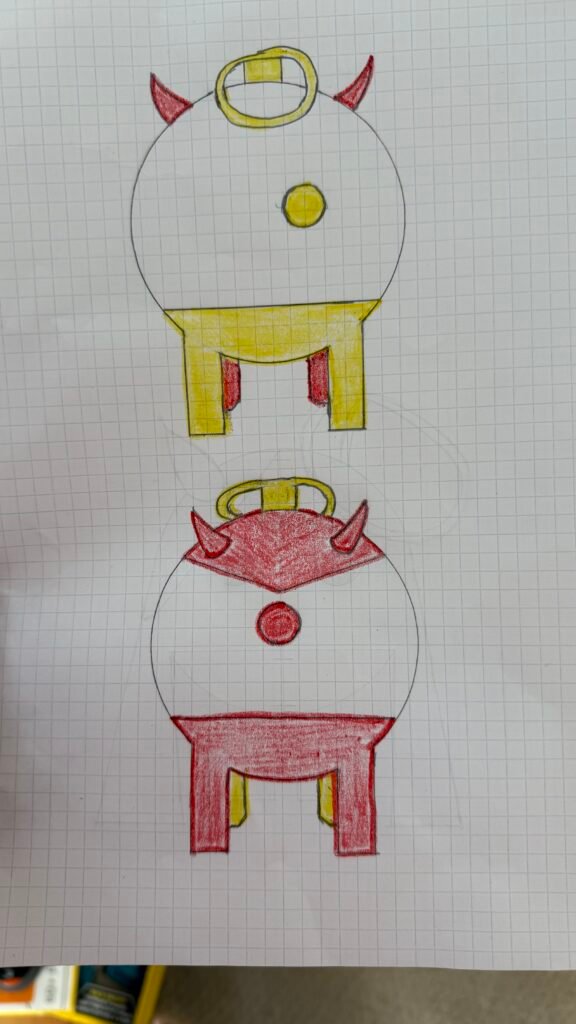
We sat down together and worked on the design. After about four drafts, he settled on the one he loved most. Meanwhile, my daughter jumped in and made her own “prototype” by cutting out one of the earlier drafts, stapling it together, and stuffing it with toilet paper. Honestly, that little paper doll sparked the whole “wait… maybe I can actually make this” moment for me.
Gathering Supplies
Here’s the thing—you don’t need to be a pro sewer to make this work. (Trust me, I’m not.) But you will need a few essentials:
- Fabric that matches your child’s design (I grabbed mine at Hobby Lobby)
- Doll needle and thread
- Scissors (good sharp ones make life easier)
- A thimble (you’ll thank me later)
- Stuffing material (polyfill or similar)
Optional (but fun): we added a little fabric heart inside, where my son made a wish before we sealed it up—kind of like the Build-A-Bear experience.
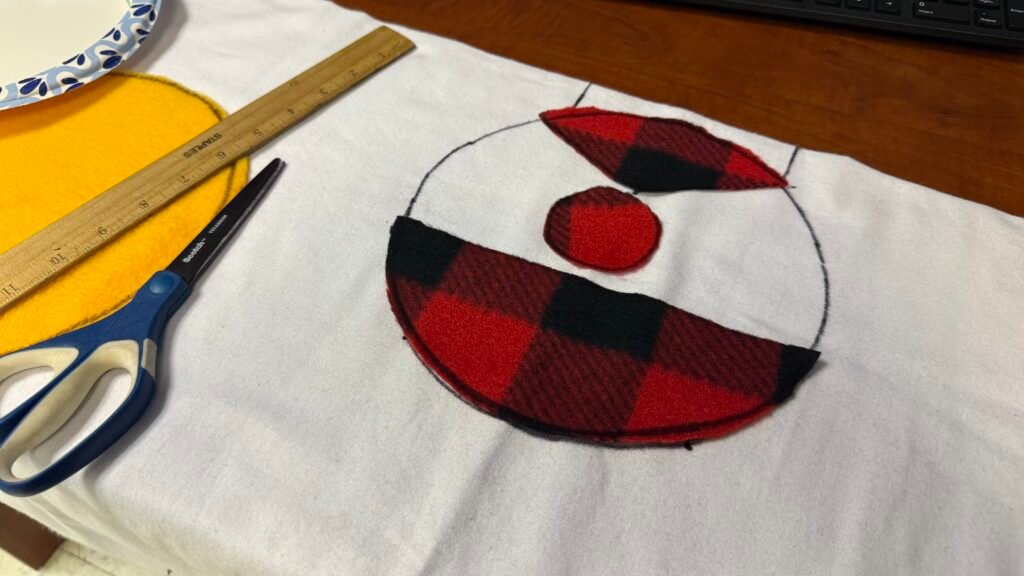
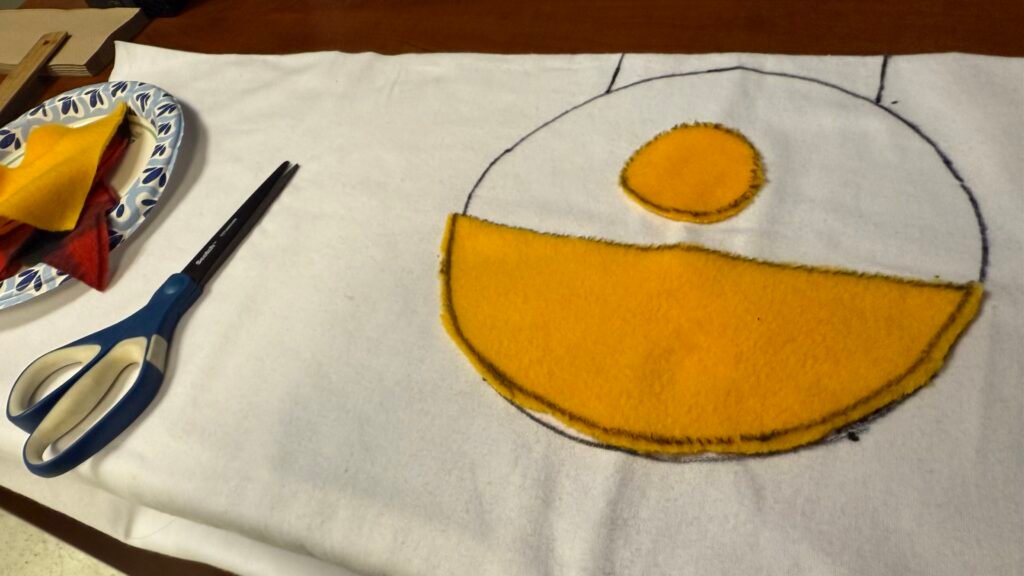
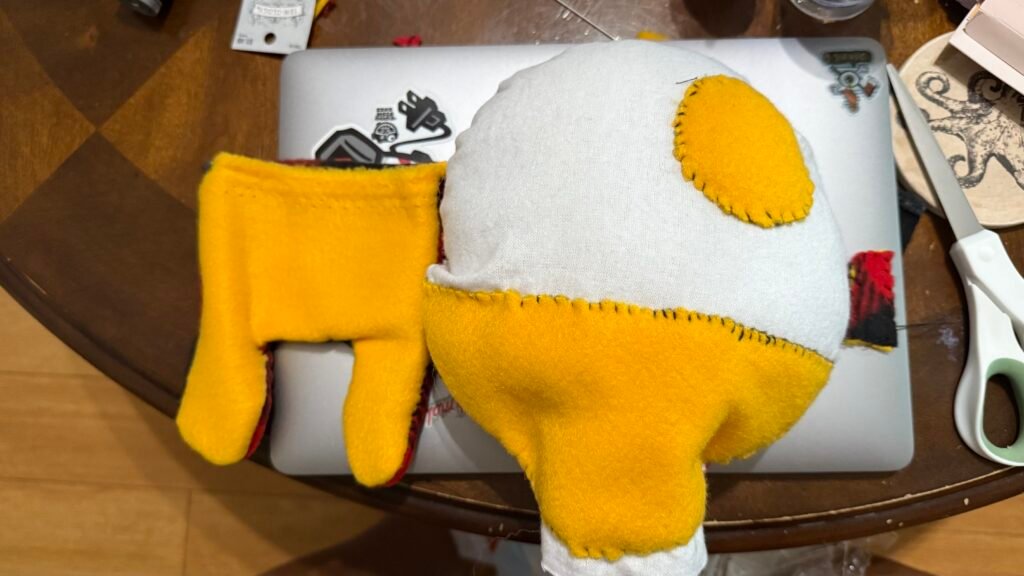
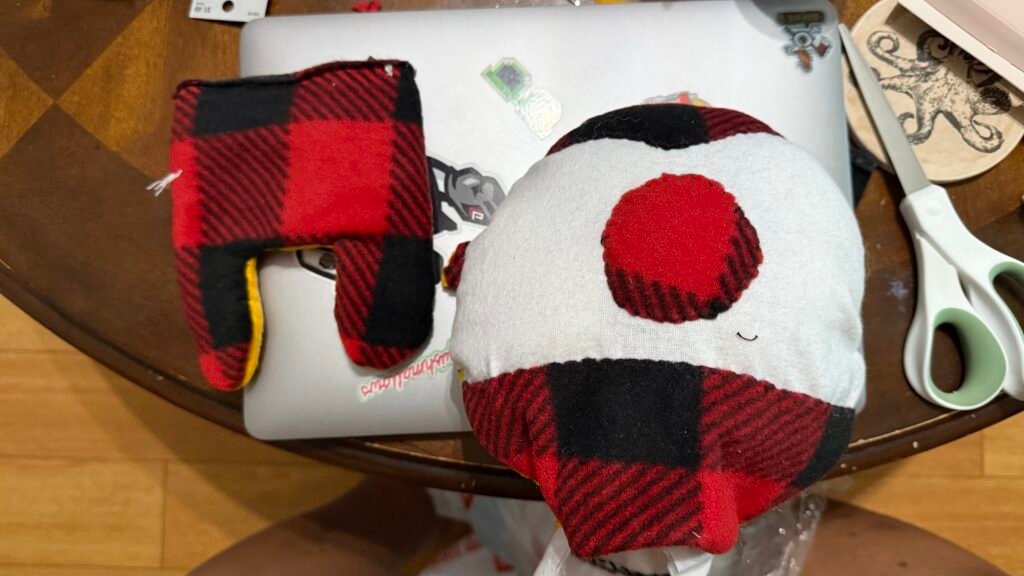
The Build Process
The first big session—cutting out and stitching the fabric—took about six hours. Sewing is definitely a test of patience, but the repetitive process actually became kind of relaxing.
Eventually, I had to call in backup. Grandma stepped in to help with some of the trickier sewing before we stuffed it. My wife pitched in with the “wish heart” idea. And, of course, YouTube tutorials became my late-night best friend when it came to figuring out things like stuffing and attaching horns.
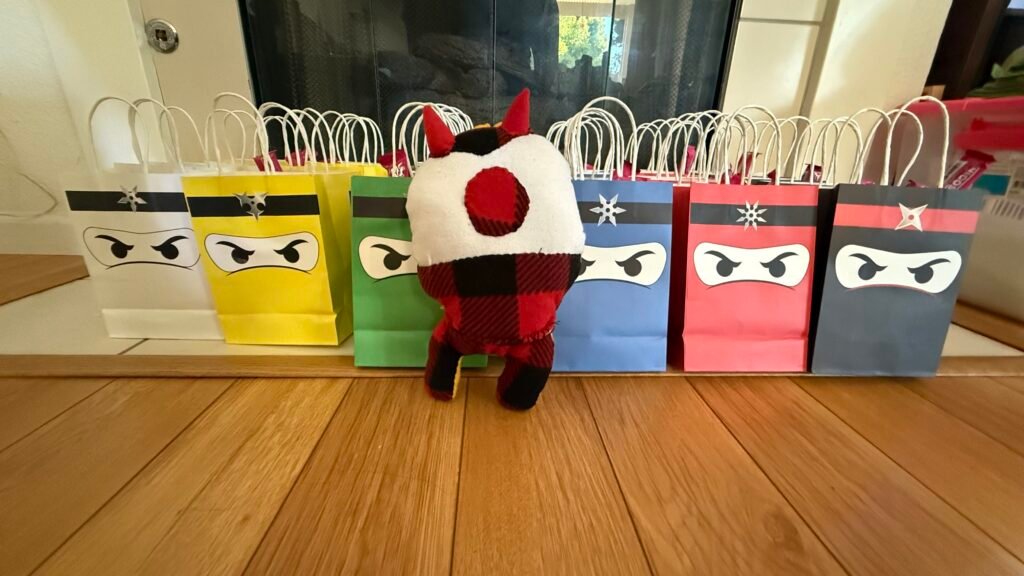
Speaking of horns… that was one of the hardest parts. Getting them stuffed and attached securely without them flopping around was a whole adventure. But we pulled it off, halo included.
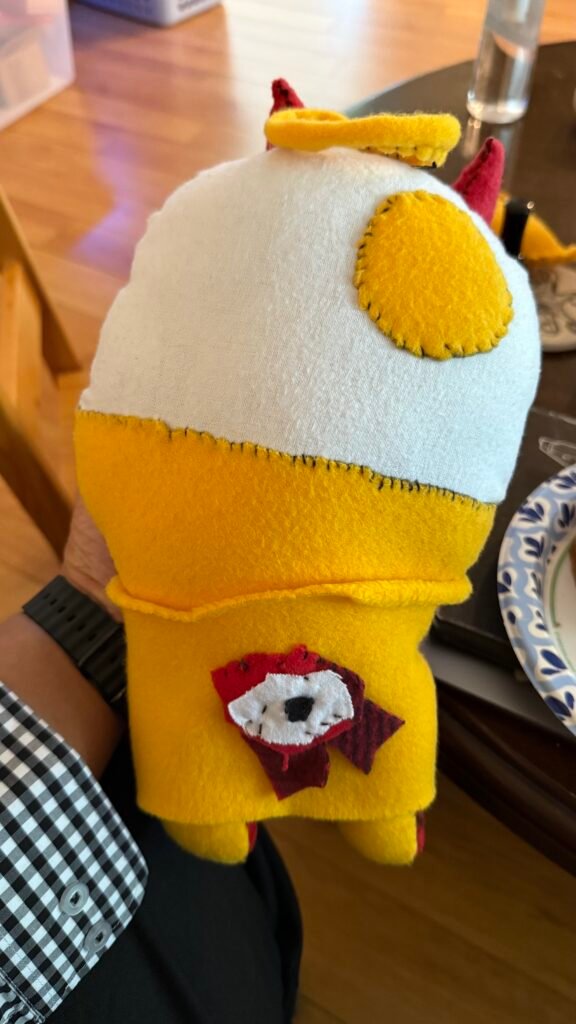
The Big Reveal
After all the sewing, stuffing, and detailing, the final product—Ruffle and Stuffle—was ready. When I gave it to my son, his face lit up. He was so proud to see his drawing come to life and immediately added it to his everyday carry crew (yes, it goes everywhere with him).
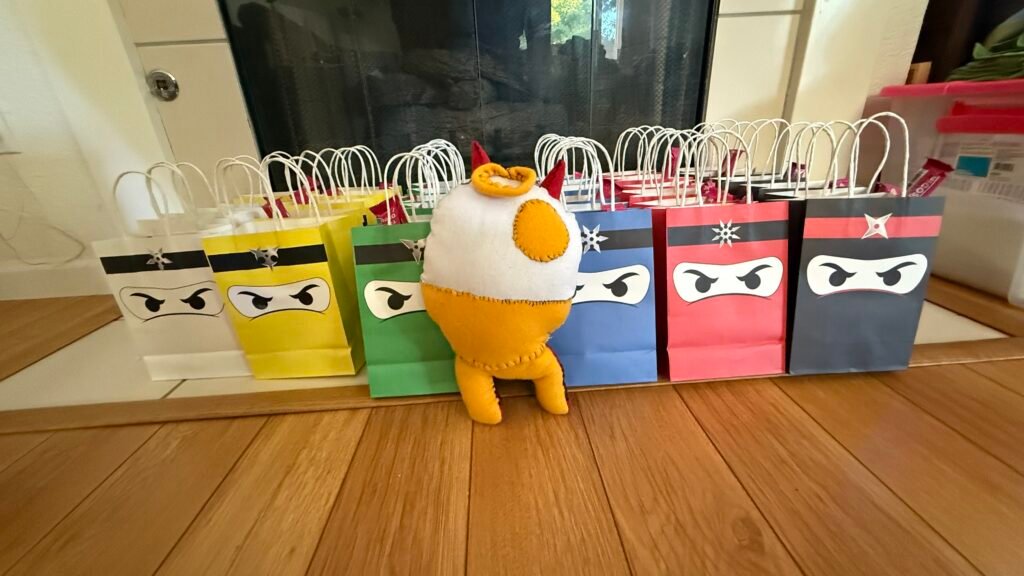
The next test will be how it survives the washing machine—but honestly, just seeing his excitement made every hour worth it.
Why This Project Mattered
Sure, I could’ve just ordered one online. But this project became something much bigger:
- A chance to spend quality creative time as a family
- A way to challenge myself to learn something new (hello, sewing 101)
- A memory my son will never forget—his imagination literally stitched into reality
It also reminded me of something my dad once did for me when I was little (but that’s a story for another post).
Tips If You Want to Try This Yourself
If you’re thinking about making your own stuffed animal from your child’s drawing, here are a few tips I learned:
Start Simple
Pick a drawing that’s not overly complicated for your first attempt. Simple shapes = easier sewing.
Use Sturdy Fabric
Kids play rough—choose fabric that can handle love, hugs, and a few drops in the dirt.
Don’t Stress Perfection
Your kid won’t care if the stitches aren’t perfect. They’ll just be excited to see their creation come to life.
Involve the Whole Family
Having everyone pitch in makes it more fun. And honestly, those little moments of teamwork are what make the project special.
Final Thoughts
Creating Ruffle and Stuffle from my son’s drawing was one of the most rewarding projects I’ve ever taken on. It took time, patience, and plenty of YouTube tutorials, but seeing the joy it brought him made it completely worth it.
So, if you’ve ever thought about how to turn a drawing into a stuffed animal, I say go for it. You might just surprise yourself—and create a memory your kid will carry for years.
Thanks for hanging out with me on this post. I’ll catch you in the next one!
~ Sean Flac 2.0
Leave a Reply